Enter the student's Last
Name and Student ID
number.
Click or press ENTER. If student last name
and ID are not known use Find
Student Record for help.
The Original Document Groups separates the available documents
by the processes the student has been in or may be in currently.
Click on the Document
icon in the Workflow/Process where
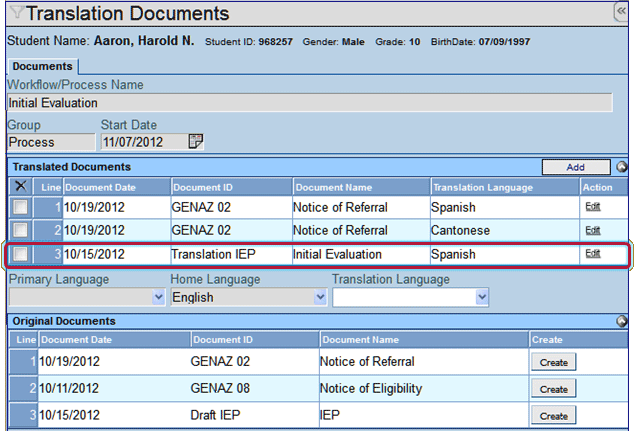
the document to translate resides. The Translation Documents screen
opens.
Documents that have been translated display in the Translated Documents
section, along with the language used in the translation.
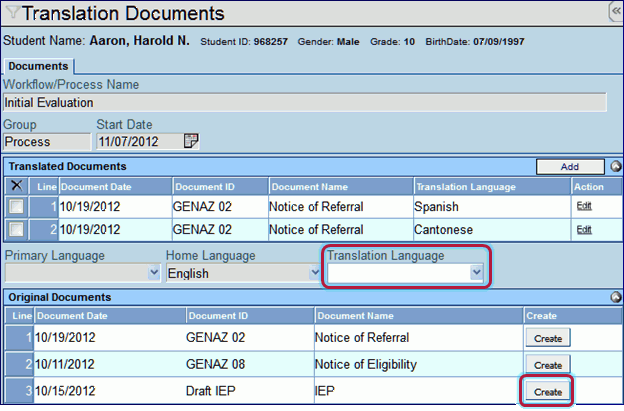
Click Translation
Language and select the language
to use.
In the Original Documents section, click
next to the document to be translated.
NOTE: Selecting the
Translation Language will filter the results of the Original Documents
available for translation. Some documents may not be available in
all languages.
The document displays in the Translated Documents section with
the Document Date, Document ID, Document Name, Translation Language,
and Action.
Click Edit
in the Action column to open the document for editing.
The document screen opens. The language of translation displays
next to the document title. The document will open allowing users
to input or edit any additional information.