Create
New Prior Written Notice
Create
New Prior Written Notice Create
New Prior Written Notice
Create
New Prior Written Notice to begin creating
the new PWN. The Document Definition creation window will open.
to begin creating
the new PWN. The Document Definition creation window will open. and select PriorWrittenNotice
(K12.SpecialEd.AZ.Document). and select PriorWrittenNotice
(K12.SpecialEd.AZ.Document).
and select PriorWrittenNotice
(K12.SpecialEd.AZ.Document). and select PriorWrittenNotice
(K12.SpecialEd.AZ.Document). to create the new Prior Written Notice.
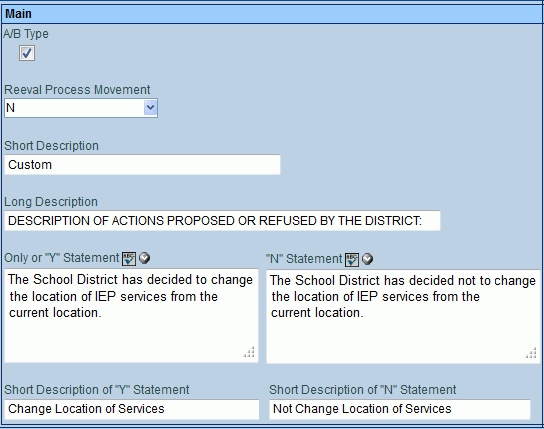
and select Allow Process Movement
or Exit Process if either
is appropriate, as in the example above. Otherwise a default N
displays.
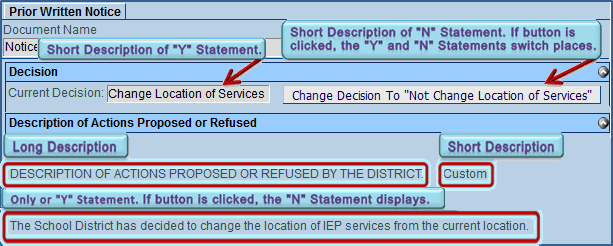
to create the new Prior Written Notice.
and select Allow Process Movement
or Exit Process if either
is appropriate, as in the example above. Otherwise a default N
displays. to spell
check and
to spell
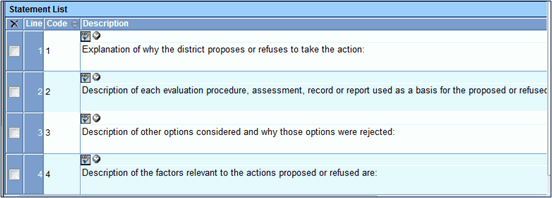
check and  for more space. on the Statement
List bar to add a prompt statement for detailing the scope of
the decision. A line is added to the grid. to spell check and for more space.
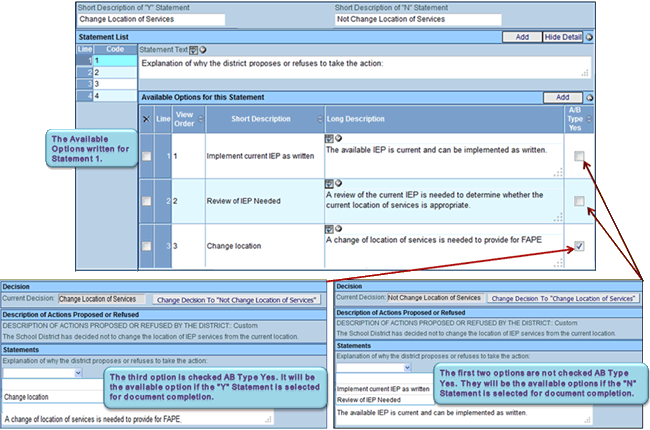
when complete. on Available
Options for this Statement bar. A line is added to the grid.
to spell check and for
more space. again and repeat
entering Short and Long Descriptions to add additional selections
to the drop-down. .
for more space. on the Statement
List bar to add a prompt statement for detailing the scope of
the decision. A line is added to the grid. to spell check and for more space.
when complete. on Available
Options for this Statement bar. A line is added to the grid.
to spell check and for
more space. again and repeat
entering Short and Long Descriptions to add additional selections
to the drop-down. .